Do you have any questions about the offer or the setup?
The XR-EASY team will answer all your questions by email. You can fill out the form below to send us an email
You can try XR-EASY with four already into VR converted test models but to test the additional features (automatic CAD-to-VR converter and teleport points) we can send you a license that works for 14 days.
You are currently viewing a placeholder content from HubSpot. To access the actual content, click the button below. Please note that doing so will share data with third-party providers.
More InformationBelow we describe comprehensively how XR-EASY VR STUDIO works.
For VR professionals, we also offer quick guides for download:
Depending on your planning software there are various ways to integrate XR-EASY into your workflow. If treated as an individual software, a file exported from the planning software can be easily converted into a XVR file, our native file format.

There is also the possibility to implement a direct export from a planning software to XR-EASY.
Refer to our contact options for more information on the implementation and suported file formats!
The VR headset is charged via the USB-C port with the included charging cable and power plug. Please schedule regular charging in advance to ensure an uninterrupted VR experience.

Since the charging options, especially for controllers, differ depending on the manufacturer, we hereby refer to our own extended knowledge base. We have categorized the headset types and implemented our own manuals. There you will also find links to the manufacturers’ manuals or websites.
First, buyers must familiarize themselves with the devices – VR headset and controller – and how they work. The interpupillary distance for the headset’s lenses should be set up correctly as soon as possible to avoid any illments.
Likewise, fitting the headset to the user’s own head proportions is of uttermost importance.

⇒ For more information go to Starting a VR session
Desktop mode refers to the use of XR-EASY on a standard Windows computer without VR headset. This mode differs fundamentally in action possibilities, options, and purpose from using XR-EASY with a VR headset. Desktop mode is primarily used to prepare sessions and host the VR session (with a stable internet connection). If only one person is in the VR headset, this session can be accompanied via the desktop. However, the professional will also notice planning errors on the desktop.
⇒ For more information go to Desktop Mode

While there may be differences in the setup process, most VR headset software demands the user to configure the play area by chosing between two modes:
Please refer to the headset’s manual or online content for a step-by-step guide on how to configure your play area. A general instruction can be found below:
After chosing for the prefered mode, continue as follows:
Custom mode
Quick mode

This section describes joining while using the same WiFi network as the session host.
For joining the VR session from a different network, go to “Main menu” ⇒ “Can I join a coop session manually?”

The name of the host (1) can be changed in the “Settings” of coop sessions.
Refer to “General functions” ⇒ “How can I join a coop session?”

If you encounter problems during session joining, please check Troubleshooting / Other:
⇒ “My model is not loaded into the VR session. What is the reason for this?”
⇒ “The window for automatic session entry does not appear. What is the reason for this?”
Once a VR user enters the session, they are automatically placed at the center of the model.
To change the start position, the teleport points function must be used.
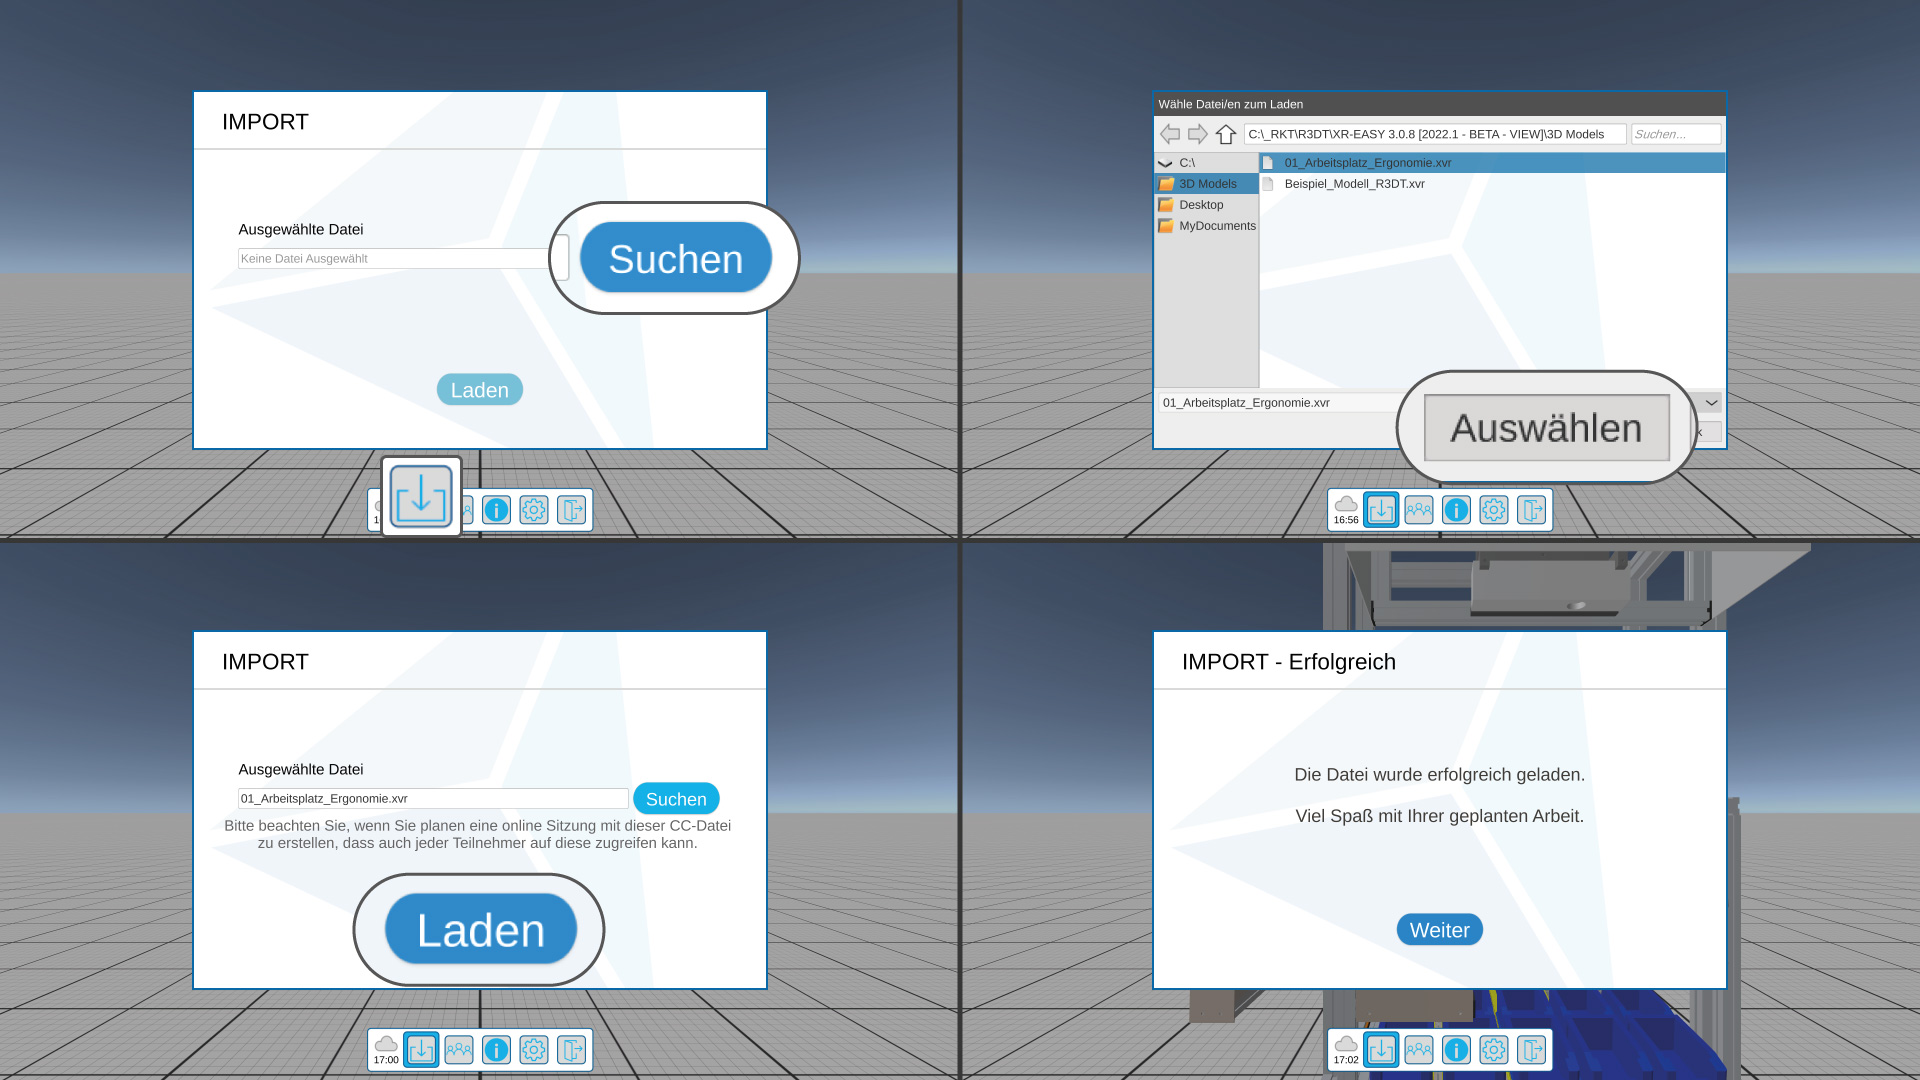
The following entries describe the process for starting XR-EASY manually and loading files in detail:
⇒ “How can I start XR-EASY manually?”


By default, the teleport function is active. If teleport points are set up by the host, the teleport points function becomes active and the teleport function is deactivated.
More information about both options can be found in the following entries.
The teleport function allows the user to freely reposition in the VR session.

For an instruction and setup guide on Teleport Points, go to:
The Teleport Point function allows for restricted user repositioning in the VR session.


⇒ To manually load a coop session, go to “Can I join a coop session manually?”

⇒ Refer to: “How do I share my XVR file with other participants?


For how to look up the session ID in desktop mode, go to the following entry:


⇒ Refer to: “How do I share my XVR file with other participants?

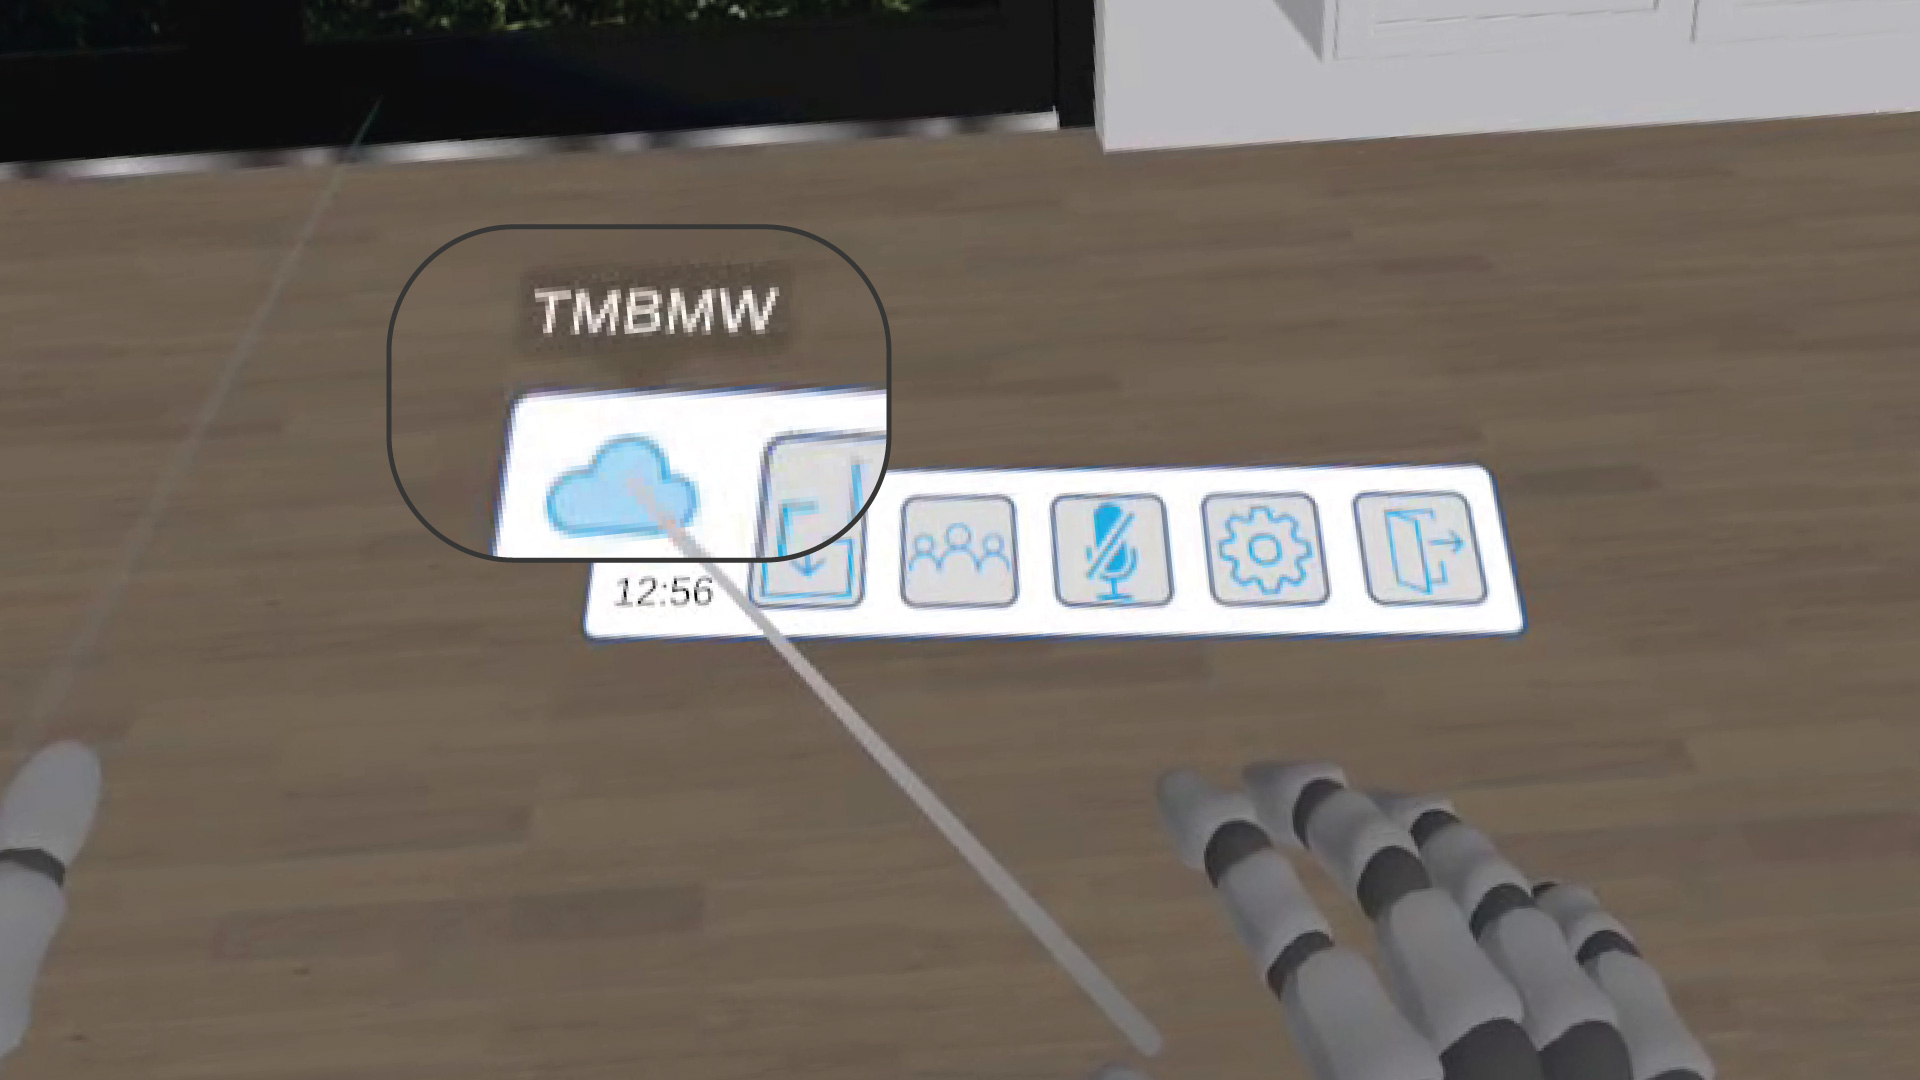
Connectivity to R3DT Cloud must be established ➔ ✅ Connected (3)


How to look up the session ID in VR can be found under the following entry:


If no teleport points have been set by the host, the center of the model is defined as the starting position.
To define a different start position, at least one teleport point must be set. However, this disables the free teleport function. With the use of teleport points, the VR user is automatically set to the first teleport point when entering the VR session.
The center point of the model can be within an object (e.g. table, cabinet) or a wall. In this case, a VR user would be directly inside said object or wall when entering the VR session. This can lead to a negative experience for the customer. Due to this, the starting position should be identified beforehand and possibly changed by using the teleport points.

Once position and viewing angle of the viewpoints have been configured, the changes can be accepted or rejected via the window at the bottom:

Viewpoints can also be set up during a coop session. This can help if the client wants to view the model from a certain position or perspective.
Once set up, the VR user can jump (< or >) to the new viewpoints.

⇒ Refer to: “Viewpoints“

Alternatively, viewpoints can also be deleted via the list under Edit ➔ Viewpoints ➔ Set+Label Viewpoints
⇒ Refer to: “Which setting options are available?” – List of all viewpoints


More information can be found in the following sections:
⇒ Participation in VR: “Can I join a coop session in VR manually?”
⇒ Participation in Desktop Mode: “How can I join a coop session?”
XR-EASY creates an XVR file when exporting a model from the planning software under the following file path:
“*\XR-EASY 3.x.x\3D Models\name-of-offer\name-of-offer.xvr”
The file can be copied and shared with other participants.

The file must be loaded onto the VR headset before joining the coop session:

1. The file transfer remains at 0% or stops halfway through.
2. The loading process is aborted.
3. An error message appears.
First case:
The automatic file transfer only works if the VR headset and the PC with the planning software are in the same network.
If a very large model is loaded, it may take several minutes before the file is transferred. This could result in the first case, and it should be waited to see if it is due to the increased loading time.
First or second case:
If the loading indicator still shows 0% even after several minutes, or if the loading process stops, another cause can be assumed:
Putting down the VR headset can lead to an abortion of the charging process, since the standby mode of the headset is initiated after a short time
Leaving the play area also leads to an abortion of the file transfer, since the VR headset turns on the external cameras and thus automatically leave XR-EASY
Often a combination of the two previous causes occurs, e.g. if the VR goggles are put down outside the game area during the loading process
The network connection must be stable at all times: any loss of connection can also cause the file transfer to stop
Any of these causes will require the connection to be re-established. For this purpose XR-EASY must be restarted.
⇒ Refer to: “How do I end the session?”
Third case:
If an error message appears, the instructions given should be followed.
The face cushion can be removed for cleaning or replacement due to traces of usage:

The attached client instruction guide can help discussing these points:

It is important to clarify that the virtual space is not about visuals, but about spatial conditions and thus aspects of ergonomics and proportion.
The virtual display of textures and light effects in the model will be much more impressive with a custom rendered image.
We recommend setting up teleport points – before using them with customers – for the following reasons:
You are currently viewing a placeholder content from Facebook. To access the actual content, click the button below. Please note that doing so will share data with third-party providers.
More InformationYou are currently viewing a placeholder content from Hubspot Meetings. To access the actual content, click the button below. Please note that doing so will share data with third-party providers.
More InformationYou are currently viewing a placeholder content from Google Maps. To access the actual content, click the button below. Please note that doing so will share data with third-party providers.
More InformationYou are currently viewing a placeholder content from OpenStreetMap. To access the actual content, click the button below. Please note that doing so will share data with third-party providers.
More InformationYou are currently viewing a placeholder content from Instagram. To access the actual content, click the button below. Please note that doing so will share data with third-party providers.
More InformationYou need to load content from reCAPTCHA to submit the form. Please note that doing so will share data with third-party providers.
More InformationYou are currently viewing a placeholder content from X. To access the actual content, click the button below. Please note that doing so will share data with third-party providers.
More Information